- Why Choose Peel and Stick Wallpaper for Your Backsplash
- Essential Tools and Materials for Your Project
- Preparing Your Backsplash Surface
- How to Apply Peel and Stick Wallpaper to Backsplash
- Navigating Tricky Areas and Obstacles
- Design Tips for a Professional-Looking Finish
- Maintaining Your Peel and Stick Backsplash
- Troubleshooting Common Installation Issues
- Design Inspiration and Style Ideas
- Conclusion: Transform Your Kitchen with Confidence
- FAQ
Are you tired of your old kitchen backsplash? Looking for a quick fix? I was too, until I found peel and stick wallpaper. It’s affordable and doesn’t harm your walls. I updated my kitchen without spending a lot or doing a big renovation. Here, I’ll show you how to use peel and stick wallpaper for your backsplash. You’ll learn how to apply it and get some key installation tips.
Key Takeaways
- Peel and stick wallpaper is a budget-friendly alternative to traditional tile backsplashes
- It’s easy to install and can be applied without damaging existing surfaces
- Proper cleaning and measuring of the backsplash area are crucial before applying wallpaper
- Planning the wallpaper layout and cutting the wallpaper accurately are essential steps in the installation process
- Using peel and stick tiles for small areas and avoiding installation on freshly painted surfaces can ensure a successful project
- Learning how to apply peel and stick wallpaper to backsplash and following essential peel and stick wallpaper installation tips can help you achieve a professional-looking finish
- With the right tools and supplies, you can achieve a beautiful and durable backsplash that will last for years to come

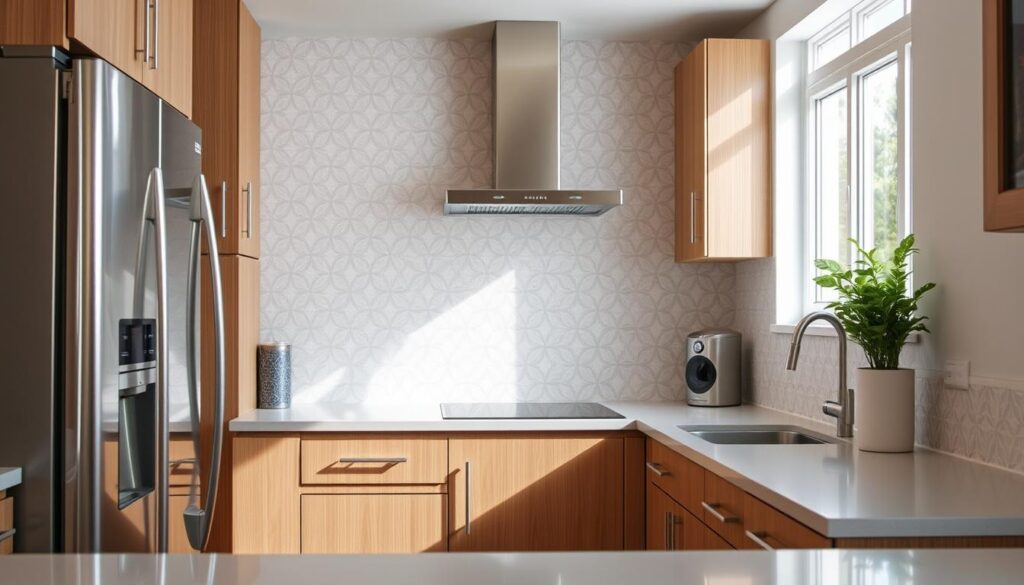
Why Choose Peel and Stick Wallpaper for Your Backsplash
Looking to refresh your kitchen? A backsplash wallpaper guide can help a lot. With a DIY peel and stick backsplash tutorial, you can get a pro look without the cost of tiles. Peel and stick wallpaper is affordable and comes in many designs, fitting your kitchen style perfectly.
Peel and stick wallpaper is easy to put up and lasts long. It’s great for areas like the sink or stove, where messes happen often. The surface is easy to clean, and it’s safe for walls, perfect for renters or those who don’t want to damage their walls.
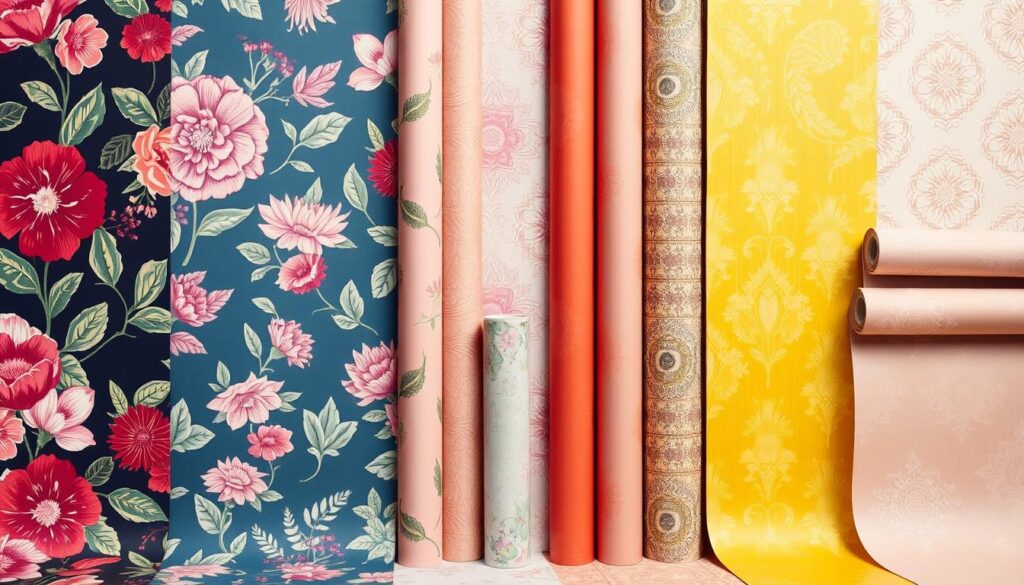
Popular designs for kitchen backsplashes include Travertine, Captivating Marble, and Realistic Tile Wallpaper. With over 300 prints and patterns, you’ll find the perfect match for your style. Many brands also offer a wallpaper calculator to help you figure out how much you need, making your DIY project easy to start.
Cost-Effective Alternative to Tile
Peel and stick wallpaper is cheaper than tile, starting at around $10.67. It’s a budget-friendly way to update your kitchen without spending a lot.
Quick Installation Process
Installing peel and stick wallpaper is fast, taking less than an hour. It’s ideal for those who are busy but want a professional look without the hassle of tile installation.
Damage-Free Application
Peel and stick wallpaper is easy to apply without damaging your walls. This makes it perfect for renters or homeowners who don’t want to harm their walls.
Essential Tools and Materials for Your Project
To make your easy peel and stick backsplash install a success, you need the right tools and materials. A step-by-step backsplash wallpaper project requires careful attention and the right tools for a professional look.
You’ll need a measuring tape, scissors or a utility knife, a smoothing tool, and cleaning supplies. A felt-covered smoother and craft knife can make the job easier. These tools help you get a bubble-free and lasting result.
Make sure to buy enough wallpaper for your area. Measure the area to figure out how much you need. It’s best to buy all the rolls at once to avoid color differences.
For more details on step-by-step backsplash wallpaper project, check out this website. With these tips and the right tools and materials, you can confidently complete your easy peel and stick backsplash install. You’ll get a beautiful, professional finish.
Here are some extra tips to remember:
- Measure the area to be covered to ensure the right quantity of wallpaper
- Buy all the rolls at once to prevent color discrepancies
- Use a felt-covered smoother and craft knife for optimal application and finishing
- Clean the walls beforehand and allow them to dry for 24 hours
Preparing Your Backsplash Surface
To get a great peel and stick backsplash, you need to prep your surface right. Start by deep cleaning your walls to get rid of grease, dust, and residue. Use hot water and soap or a degreaser for this. It’s key for a lasting installation and follows the best practices.
After cleaning, check your wall for any damage or imperfections. Look for holes, cracks, or uneven spots that need fixing. Fixing these will give you a smooth surface for your new backsplash. This way, you’ll get a professional look that boosts your kitchen’s style.
Cleaning Requirements
Cleaning your wall is a must. Mix hot water with soap or a degreaser to remove grease and residue. This ensures your wallpaper sticks well to the wall.
Surface Assessment
After cleaning, inspect your wall for any damage. Look for holes, cracks, or uneven spots that need fixing. This step is crucial for a smooth surface for your new backsplash.
Repairing Wall Imperfections
If you find damage, fix it before applying the wallpaper. Use spackling compound to fill holes or sand down uneven spots. Fixing these issues will give you a smooth surface for your peel and stick backsplash.
By following these steps, you’ll prep your surface well for a successful installation. Always stick to the best practices and use quality materials for your peel and stick backsplash.
| Step | Description |
|---|---|
| 1. Clean the wall | Use hot water and soap or a degreaser to remove any grease or residue. |
| 2. Assess the surface | Check for any holes, cracks, or uneven areas that may need to be repaired. |
| 3. Repair imperfections | Fill holes or cracks with spackling compound or sand down uneven areas. |
How to Apply Peel and Stick Wallpaper to Backsplash
To get a professional look with peel and stick wallpaper on your backsplash, follow some key steps. First, gather your tools like a measuring tape, sharp scissors, and a small ruler. Accurate measurement and cutting are crucial, as peel and stick wallpaper installation tips suggest.
Measure your backsplash area, noting any obstacles like outlets or switches. Cut your wallpaper into pieces, leaving extra for trimming. This makes it easier to apply smoothly. Use a level for straight edges and a smoothing tool to remove air bubbles.

Some helpful peel and stick wallpaper installation tips include starting from the center and working outwards. Use a needle pin to get rid of bubbles and apply gentle pressure to secure the wallpaper. These steps will help you achieve a stunning, professional finish.
Here are more tips for applying peel and stick wallpaper to your backsplash:
- Start with the first piece in the center, smoothing it outwards with a tool or credit card.
- Use a level to ensure each piece is straight and level.
- Apply gentle pressure to secure the wallpaper, working from the center outwards.
- Use a needle pin to eliminate any air bubbles that form during application.
| Tool | Description |
|---|---|
| Measuring Tape | Used to measure the backsplash area and cut the wallpaper to size. |
| Sharp Scissors | Used to cut the wallpaper into manageable pieces. |
| Small Ruler | Used to trim excess wallpaper and ensure a smooth finish. |
Navigating Tricky Areas and Obstacles
Every kitchen has its own challenges when installing a peel and stick backsplash. The backsplash wallpaper application guide can help you tackle these issues. You might face problems like outlets, switches, and uneven surfaces. It’s crucial to know the right techniques and tools for these areas.
A diy peel and stick backsplash tutorial can guide you through these obstacles. For instance, a utility knife can help cut around outlets and switches. Use a putty knife to smooth out air bubbles or excess adhesive for a seamless look.
Here are some tips for handling tricky areas:
- Use a level to ensure your wallpaper is straight and even
- Apply a small amount of adhesive to the back of the wallpaper and press it firmly onto the surface
- Use a credit card or similar tool to smooth out any air bubbles or excess adhesive
By following these tips and using the right techniques, you can achieve a professional-looking finish. Always follow the manufacturer’s instructions and take your time, especially with tricky areas.
| Surface Type | Recommended |
|---|---|
| Painted gypsum wall | Yes |
| Mirror | Yes |
| Ceramic tiles | Yes |
| Stucco wall | No |
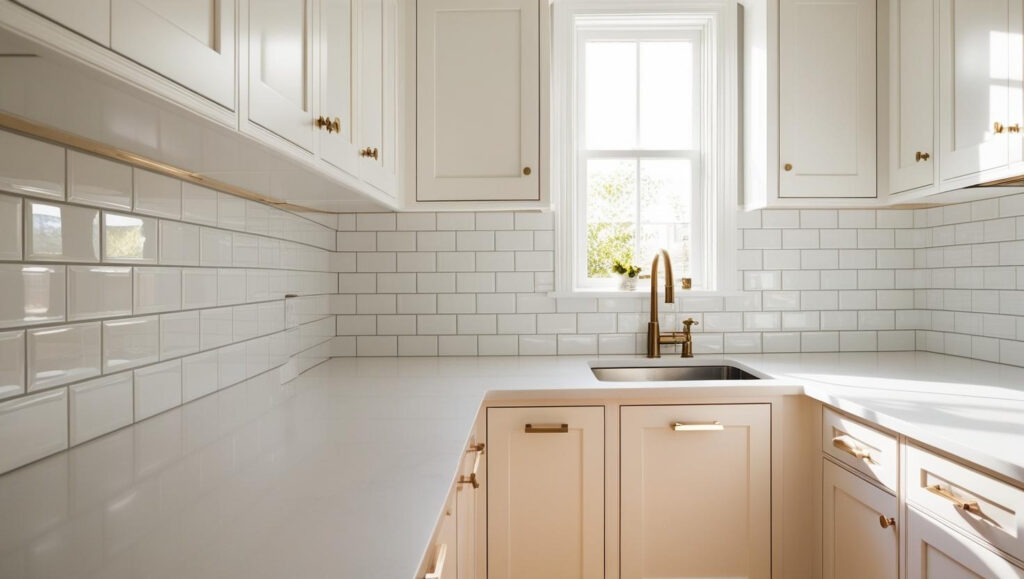
Design Tips for a Professional-Looking Finish
Getting a professional look with peel and stick backsplash is all about the details. To decorate with peel and stick backsplash, think about the look you want in your kitchen. Consider the style, color, and texture that will match your decor. Backsplash decor with peel and stick wallpaper can help create a cohesive look.
For a kitchen, a smooth vinyl at least six mil thick is best. It’s durable and easy to clean. Here are some tips for a professional finish:
- Pick a color that goes with your decor. Order all rolls at once for a consistent look.
- Think about the texture of the wallpaper. Vinyl is durable and good for kitchens.
By following these tips, you can get a professional look with your peel and stick backsplash. You’ll have a beautiful and functional kitchen.
Maintaining Your Peel and Stick Backsplash
To keep your peel and stick backsplash looking great, follow some easy tips. Cleaning the surface regularly is key. Use a damp sponge or cloth with mild soap. Stay away from harsh chemicals or abrasive cleaners, as they can harm the material.
Protecting your backsplash from heat and moisture is also crucial. This is especially true near the stove or sink. By doing this, your kitchen will stay beautiful for many years. For more info on installing a peel and stick tile backsplash, check out this website.
Here are some more tips for upkeep:
- Wipe down the surface with a damp cloth after each use
- Avoid exposing the backsplash to direct sunlight or extreme temperatures
- Use a gentle cleaner and avoid scrubbing too hard
By following these simple tips, your peel and stick backsplash will stay in top condition. Enjoy a beautiful, easy-to-maintain kitchen.
| Maintenance Tip | Importance |
|---|---|
| Regular cleaning | High |
| Protection from heat and moisture | High |
| Gentle cleaning products | Medium |
Troubleshooting Common Installation Issues
When you start a backsplash wallpaper project, be ready for any problems. Air bubbles under the wallpaper are a common issue. Make sure the wall is clean, dry, and free of dust. This helps the adhesive stick well.
Misaligned wallpaper strips can also happen. Use a level and pencil to mark the wall. Apply the strips carefully, matching patterns at seams. Having extra wallpaper is a good idea to fix any mistakes.
Other problems include adhesion issues in humid areas or on textured walls. Use a primer if needed, and make sure the wall is smooth. Regularly check and clean the wallpaper to keep it looking good.
Here are some tips to fix common problems:
- Use a tape measure or ruler to measure the wall before cutting the wallpaper
- Apply the first strip of wallpaper to the bottom corner of the wall and work your way up
- Use a smoothing tool to remove air bubbles and wrinkles
- Seal the edges of removable wallpaper panels with adhesive or caulk
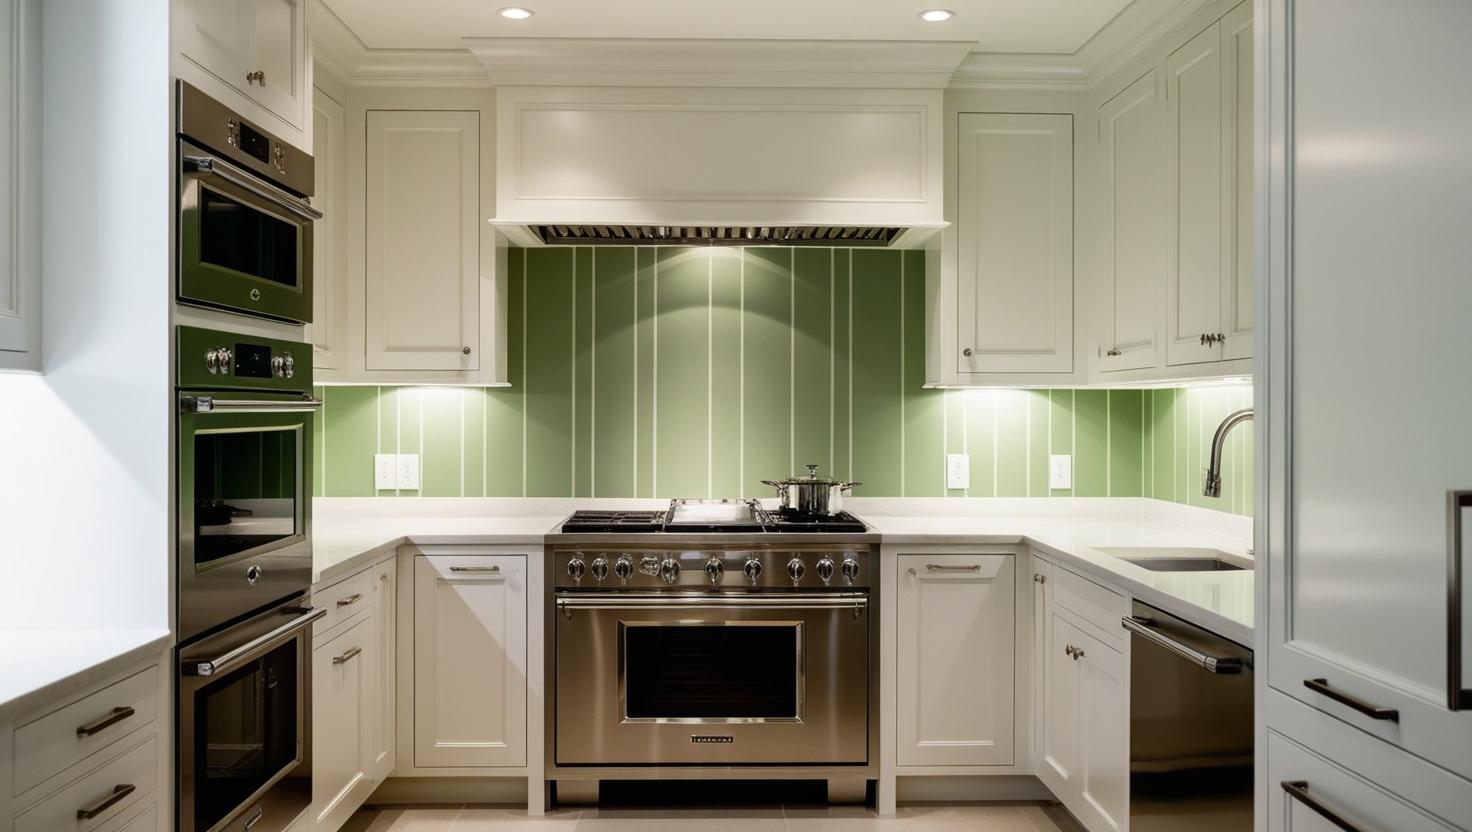
Design Inspiration and Style Ideas
Peel and stick wallpaper opens up a world of possibilities for backsplash decor. You can pick from many patterns and designs, from modern to classic. Let’s explore some styles to inspire your kitchen project, including modern patterns for a contemporary look.
Popular choices include geometric patterns, nature prints, and marble designs. You can also go for classic designs like subway tile or brick. For something unique, try trending styles like bold colors or metallic accents.
Ready to start? Here are some tips for decorating with peel and stick backsplash:
- Choose a pattern that matches your kitchen decor
- Consider the size and scale of the pattern
- Think about the color and texture of the wallpaper
By following these tips and exploring design options, you can make a beautiful backsplash. It will enhance your kitchen’s look and feel.
Conclusion: Transform Your Kitchen with Confidence
As we finish this guide on using peel and stick wallpaper for an easy backsplash upgrade, I hope you’re excited and ready to change your kitchen. We’ve shown you how to get started, how to prepare the surface, and how to keep your backsplash looking great. You now have the skills to make your kitchen look new and improved.
Peel and stick wallpaper is perfect for renters or homeowners who want a quick update. It’s affordable and comes in many designs. You can make your kitchen your own with modern or classic styles.
This DIY project lets you try out different designs without worrying about damage. So, pick the perfect peel and stick backsplash that matches your style. Then, enjoy your updated kitchen with confidence.
FAQ
What are the benefits of using peel and stick wallpaper for a kitchen backsplash?
Peel and stick wallpaper is a budget-friendly, quick, and damage-free option. It lets you change your kitchen’s look easily without a big renovation.
How difficult is the installation process for a peel and stick backsplash?
Installing a peel and stick backsplash is easy and can be done in under an hour. With some prep and the right steps, anyone can get a pro look.
Can peel and stick wallpaper be easily removed or replaced?
Yes, peel and stick wallpaper is easy to remove and replace. This makes it simple to change your kitchen’s style whenever you want.
What kind of surface preparation is required before applying the wallpaper?
Before applying, you need to prepare the surface well. Clean the wall, check for imperfections, and fix any issues to ensure a smooth surface.
How do I ensure a seamless and bubble-free application?
For a smooth finish, measure accurately, align carefully, and use the right tools. This will help you avoid bubbles and get a pro look.
Can peel and stick wallpaper be used around outlets, switches, and other fixtures?
Yes, you can work around outlets and switches to create a seamless look. With the right techniques, it’s easy to do.
How do I maintain and clean my peel and stick backsplash?
To keep your backsplash looking good, use the right cleaning methods. This will help it last for many years.
What if I encounter issues during the installation process?
You might face some problems during installation. This section offers solutions to help you fix any issues that come up.
Where can I find inspiration for peel and stick backsplash designs?
This guide shows many modern, classic, and trendy designs. It helps you find the perfect style for your kitchen.